VWusers Dlist

The faculty/staff distribution list (dlist) is a moderated email distribution list that is only used for information that is urgent, non-routine, or unforeseen.

If you have routine, non-emergency information to share with the campus community, it should be submitted to the Daily Bulletin.

VWConnect

VWConnect is VWCC’s intranet, which runs on the Microsoft Sharepoint platform. VWConnect allows VWCC employees to:

  • collaborate in a non-public forum
  • manage documents
  • implement business processes with automated forms
  • access information that is essential to VWCC’s organizational goals and processes.

VWConnect is only available on-campus or through a virtual desktop.

If you need to request a page or site on VWConnect, contact Melanie Crouch.

Daily Bulletin

The Daily Bulletin has been designed for routine, non-emergency campus notices. It can be accessed from the Virginia Western homepage on the Faculty & Staff Resources page or at http://www.virginiawestern.edu/bulletin/. All www.virginiawestern.edu email addresses will receive a copy of the Daily Bulletin each day.

Any faculty or staff member can submit postings to the Daily Bulletin by registering for an account (see below).

Additional resources

VWCC Voicemail How-Tos

How to…

Voicemail Specifics

  • Maximum length of greeting: 60 seconds
  • Maximum length of recorded message: 5 minutes (300 seconds)
  • Maximum number of messages*: 1 hour of messages
  • Life span of messages*: 60 days
  • Length of password: 3-10 digits

* subject to change in order to maintain system performance

Cisco 7961 Phone How-Tos

How to…

Telephones & Voicemail

The college uses Cisco IP phones, which are full-featured telephones that communicate over an Internet Protocol (IP) network. These phones function much like a digital business telephone, allowing you to place and receive calls and access features such as mute, hold, transfer, speed dial, call forward, and more.

Telephones

The telephones on campus use the same network that the computers use, and often your computer is plugged into your phone before it plugs into the wall. Basic functions are:

  • Dial 8- before the phone number to dial another Virginia state college or agency. This will not bill long distance.
  • Dial 9- before the phone number for any other calls, including long distance. Not all phones are set up to dial long distance.

If long distance access is needed on your phone, contact the Help Desk. Long distance should not be used for personal calls — the college is billed for these.

Each classroom has a telephone, but they will not ring and are only to be used in case of emergency.

You can access your phone’s online settings, such as Fast Dial and My Address Book, by visiting https://vwtss150.vw.edu/ccmuser.

Which phone do you have?

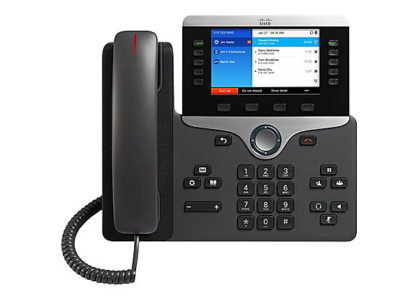
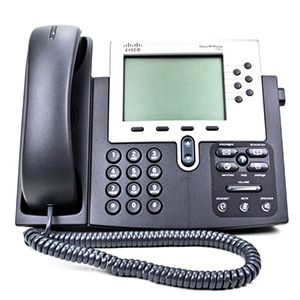
Cisco 7961 phone Cisco 88xx phone

Voicemail

Voicemail is normally only available if you have a phone number assigned directly to you. There are several different indicators that you have a voicemail:

  • a red light at the top of the handset
  • an envelope icon next to your phone number on the screen
  • a message on the second to last line of your phone display

Voicemail can be accessed by pressing the messages button on your phone and entering your voicemail password. You will also receive voicemail messages as an email attachment in your VWCC email account.

If you have never checked your voicemail, please contact the Help Desk to gain access.

Additional resources

Canvas

Canvas is a course management system that is maintained by the Virginia Community College System. It allows instructors to facilitate both online and in-person classes.

Canvas is web-based, so there is nothing for you to install or download. All you need is an Internet connection. Canvas is accessible from all browsers and mobile devices.

Tutorials for using Canvas can be found on the Canvas Infoguide.

Network Drive Mappings & Best Practices

IET presents multiple drive letters to each user. The intention is to enable each user to organize data and segregate it onto the appropriate storage. This practice enables the college to maximize its investment in storage and backup systems. Space is not limited, it is managed. Users are provided with as much space as necessary to contain all data needed to perform their job function.

H: Drive

Each user gets an H: drive that provides access to an area that holds application install points. This area is also used as a location for applications that are being distributed using either Desktop Authority or Microsoft Configuration Manager.

I: Drive

Each user gets an I: drive for data that is for the sole use of that person. This is protected by security restrictions to allow access by the user and no others. The I: drive is for important data that is not to be shared with others. Quota limits are in place for this drive. There is no limit on the amount of data that can be stored on this drive. The My Documents folder, Desktop, Pictures, Downloads,  is redirected to the network I: drive to prevent loss of data in the event of a failure of a local C: drive which is the default location for My Documents on Windows systems.

J: Drive

The J: drive is a departmental shared drive to hold data that needs to be accessible to others in the department. All departmental faculty and staff have full access to this location unless restrictions have been implemented at the request of the head of the department. This is also the location for the departmental “scan” folder where all documents scanned from the department’s printer/copier are temporarily placed. This drive also counts against the file owner’s disk quota.

K: Drive

The K: drive is for Faculty to place documents that need to be accessible to students from any Academic lab. The owner of the drive has full access to place, modify and delete files in their own personal folder. All others have read-only access.

L: Drive

The L: drive is a special shared drive. This location is for documents that need to be accessible across departments. Many special functional groups/committees exist that require collaboration on documents. By default, all faculty/staff have read-only access to this structure, with full access controlled by membership of specific groups (i.e. Budget Committee, Campus Safety and Security).  This access level is granted through request of the respective committee chair. This drive also counts against the file owner’s disk quota.

N: Drive

The N: drive is for Faculty to place documents that need to be accessible to students from any Academic lab. Anyone who can access this location has full access to view, modify or delete any files located here. This was originally created to allow students to store “work in progress” class work if they did not have a flash drive to store their work.

U: Drive

The U: drive is storage for utility data. This can be used for large data that is needed for special departmental needs. Examples are graphics, archival of data, videos and other data that is large in nature and could adversely affect disk quotas.

Wireless Access

The college provides a robust wireless network that supports access with  personally-owned devices.

VWCCWiFi

Students, VWCC and VCCS faculty, and staff using personally-owned devices can sign on to the VWCCWiFi network with their MyVWCC username and password.

Detailed instructions can be found here.

VWCCU

VWCCU is our WiFi network for campus visitors that do not have a MyVWCC username and password. An employee will need to sponsor a visiting wireless user and request this access through the Help Desk.

How to Create a PDF File

There are basically three methods for creating PDF files. Every computer on campus should have access to the first two methods.

If you need any help creating your PDF file, you can contact the Help Desk.

Microsoft Office

All Office programs have the built-in capacity to create PDF files. For example, in Word, create or open the document you wish to save as PDF. Once the document is finalized and ready to be converted:

  1. In the top menu, click File and then Save As.
  2. Choose the location where you wish to save your file.
  3. At the bottom of the Save As window, use the Save as type drop down to select PDF. This will change the suffix of the filename from .docx to .pdf.
  4. Name your file, and save it as with any other file.

Remember to also save your original Word document. If you need to make a change, it will be in the Word document, not the PDF. This same procedure will work with Excel, PowerPoint, and other Microsoft Office programs.

CutePDF

If you are not using a Microsoft Office program, you can use CutePDF to create a PDF file. CutePDF is a printer driver that will work with any program, such as your web browser.

  1. Once you are ready to create your PDF file, choose File and then Print.
  2. On the Print screen, change the printer to CutePDF Writer by selecting it from the printer list.
  3. Click Print.
  4. Rather than printing, a Save As dialog window will open. Chose the name of your file and a location and then save it as with any other document.

If you want an actual printed copy of the same document, you will need to change your printer back to your default or close the program and reopen it.

Adobe Acrobat DC

You can use Adobe Acrobat DC (not Adobe Reader) to create PDFs directly. Also, if you have Adobe Acrobat DC installed on your computer, your Microsoft Office programs may include a “Save as Adobe PDF” option in the File menu.