How to Connect to VWCCWifi with an Expired Password

Issue Scope:

When a laptop is off campus for an extended period of time, the user account password expires and must be changed on the user’s college account. The old password on the laptop then becomes out of sync with the password on the account. Upon return to campus the laptop wireless will not connect using the old password until the password is updated to match the current password.

Resolution Action:

You must connect to the college network to synchronize the new password to the laptop.

To correct this problem, follow this procedure: 

  1. Bring the laptop to campus to any location with wifi (any indoor area and some outdoor locations near emergency call boxes. You will see the network ID when in range)
  2. Power up the laptop
  3. Login with the old password and follow the steps below to manually connect to the wireless network

Manually Connect to VWCCWifi

For advanced users, you may jump ahead here if you know how connect. If you do not, see the detailed instructions below.

Jump Ahead Note: When you connect manually, enter you user ID in this format VW\vwyourid with your new password.

Log out and back in to sync passwords and get all your settings.

See end of these instructions: Update Your Computer! Be sure to check for updates

Detailed Connection Instructions

  1. Use the Windows Search at the lower right of your screen.
    Windows search box
  2. Type “Settings” and then press Enter to search.
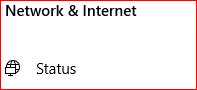
  3. In the Windows Settings screen, choose the Network & Internet option.
    Network & Internet Settings tile
  4. Select Status.
    Status
  5. Scroll to Show Available Networks.
    Show Available Networks
  6. Choose VWCCWifi.
  7. Enter your user ID in this format — VW\vwyourid — with your NEW password. Log out and back in to sync your passwords and get all your settings.

Update Your Computer

Don’t forget to check for Windows Updates! These are very important security updates which protect your computer.

  1. Use the Windows Search at the lower right of your screen.
    Windows search box
  2. Type “Updates” and press Enter.
  3. Select the Check for Updates option.
    Check Updates
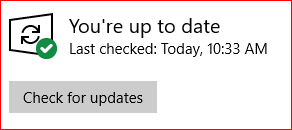
  4. Apply your updates and restart. Note: If you are prompted to upgrade to Windows 11, do not update until you have direction and are comfortable with with using Windows 11.

How to Create a PDF File

There are basically three methods for creating PDF files. Every computer on campus should have access to the first two methods.

If you need any help creating your PDF file, you can contact the Help Desk.

Microsoft Office

All Office programs have the built-in capacity to create PDF files. For example, in Word, create or open the document you wish to save as PDF. Once the document is finalized and ready to be converted:

  1. In the top menu, click File and then Save As.
  2. Choose the location where you wish to save your file.
  3. At the bottom of the Save As window, use the Save as type drop down to select PDF. This will change the suffix of the filename from .docx to .pdf.
  4. Name your file, and save it as with any other file.

Remember to also save your original Word document. If you need to make a change, it will be in the Word document, not the PDF. This same procedure will work with Excel, PowerPoint, and other Microsoft Office programs.

CutePDF

If you are not using a Microsoft Office program, you can use CutePDF to create a PDF file. CutePDF is a printer driver that will work with any program, such as your web browser.

  1. Once you are ready to create your PDF file, choose File and then Print.
  2. On the Print screen, change the printer to CutePDF Writer by selecting it from the printer list.
  3. Click Print.
  4. Rather than printing, a Save As dialog window will open. Chose the name of your file and a location and then save it as with any other document.

If you want an actual printed copy of the same document, you will need to change your printer back to your default or close the program and reopen it.

Adobe Acrobat DC

You can use Adobe Acrobat DC (not Adobe Reader) to create PDFs directly. Also, if you have Adobe Acrobat DC installed on your computer, your Microsoft Office programs may include a “Save as Adobe PDF” option in the File menu.